There’s nothing worse than a chewy, tough rib! I have had my share of terrible ribs, at home and at restaurants. BUT, when I finally get a finger-licking, out-of-this-world rib, I instantly forget all those bad experience and only hear angels singing from above. It’s a crap-shoot when it comes to ribs. I made it my personal mission to perfect The Rib.
Ribs are prepared in a variety of ways…. smoked or grilled or baked or boiled, dry rub or wet rub, sweet or spicy. It makes me wonder… is it an art or a science? Should I go with pork or beef? What destroys a rib? I’ve been playing around with ribs for years, and I’ve definitely had some hits and misses. I fondly remember when Nick and his roomie Terry first cooked for me a delectable batch of finger-licking ribs. They had an amazing amount of flavor that was intensified due to slow cooking on a charcoal grill. Apparently, Nick doesn’t remember this 16 years later, but I do. Maybe Terry remembers, too? Those ribs have never been recreated, but I still smile when I think about those good ol’ college cooking days.
After a a few dozen practice rounds, I think I have finally perfected my favorite way to prepare ribs. I only use baby back ribs, as I find that St. Louis style ribs are too meaty and chewy for my taste. Nothing wrong with them- hey, I use to live in St. Louis! I just haven’t found a good way to make them tender or enjoyable at home. I just have better results with baby back. I also allow for some resting time during the process… it’s part of the “art.”
First, I grab two long sheets of heavy duty foil, slighting overlapping them horizontally. Meanwhile, I put the ribs on a cutting board. Using a sharp knife, I cut the thin membrane layer off from the back of the ribs, so the flavor can infiltrate the meat. If you have no idea what I’m talking about, then watch this video: https://www.youtube.com/watch?v=d_fqJcc4n The more you do it, the easier it gets: trust me! Plus it takes a good knife. I use a paring knife with a beak tip.
Next, I use a paper towel to absorb any moisture on the meat. Then I massage the ribs on both sides with my Special Rub Mix <—yes, I capitalized it. I have been known to give it away in little jars for Christmas. The rub is made from bulk spices I get from Costco. It consists of brown sugar, paprika, cumin, dark chili powder, cayenne, and crushed red pepper. I also toss in a large amount of kosher salt (my fav cooking salt) and some freshly ground black pepper. I wrap the ribs in heavy duty foil and refrigerate for 2-24 hours.
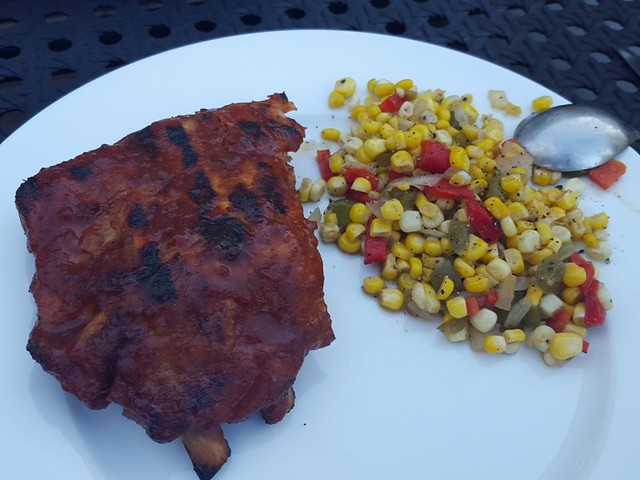
When it comes to cooking time, I set the ribs out on the counter for 30 mins to rest and preheat the oven to 300 F. I place the foil wrapped ribs on a baking sheet and place in the oven for 2.5 hours. When finished, I take out and let them rest (again) for 30 minutes. Typically I need this time to cook other items in the oven…. like baked beans or potatoes or cornbread. At this point, I also make the BBQ sauce. Okay, I don’t ACTUALLY make it, but I do put it in a bowl. I play around with store bought brands, sometimes mixing a regular smoked variety with a spicy variety. Or I use a regular type and add some hot sauce. Often times, though, I use Wango Tango BBQ from Dinosaur.
After the 30 minutes, I unwrap the ribs and baste the BBQ sauce concoction on the ribs with a brush. Then I crisp them up. In the summer, I typically grill the ribs quickly on each side. In the winter (yes, I live in the arctic), I broil them for a brief amount of time. Basically, you just eye-ball it til preferred crispness. Serve along side more sauce!
Lastly, you eat.
Mmmmmm.
If anyone else has a preferred, proven artistic or scientific way, let me know!
